
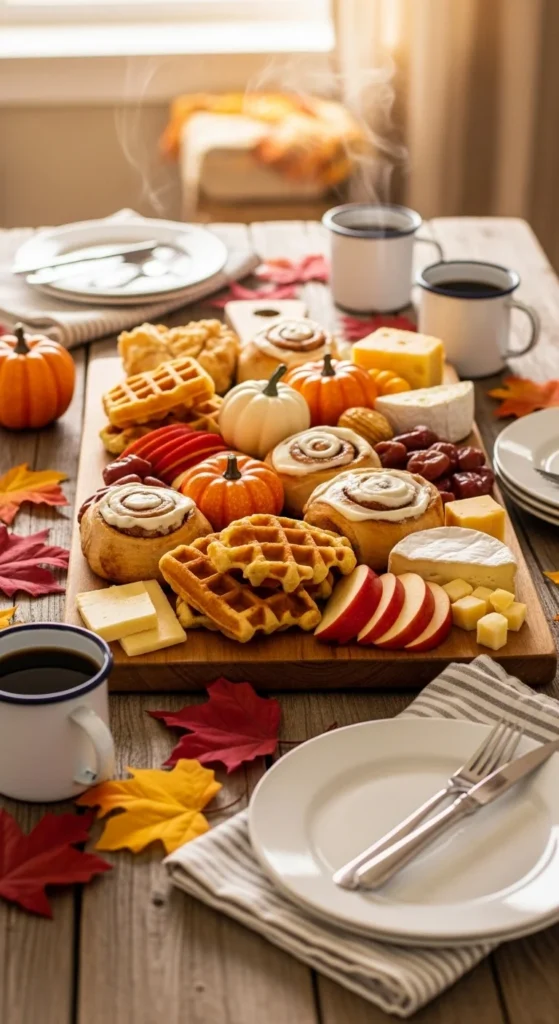
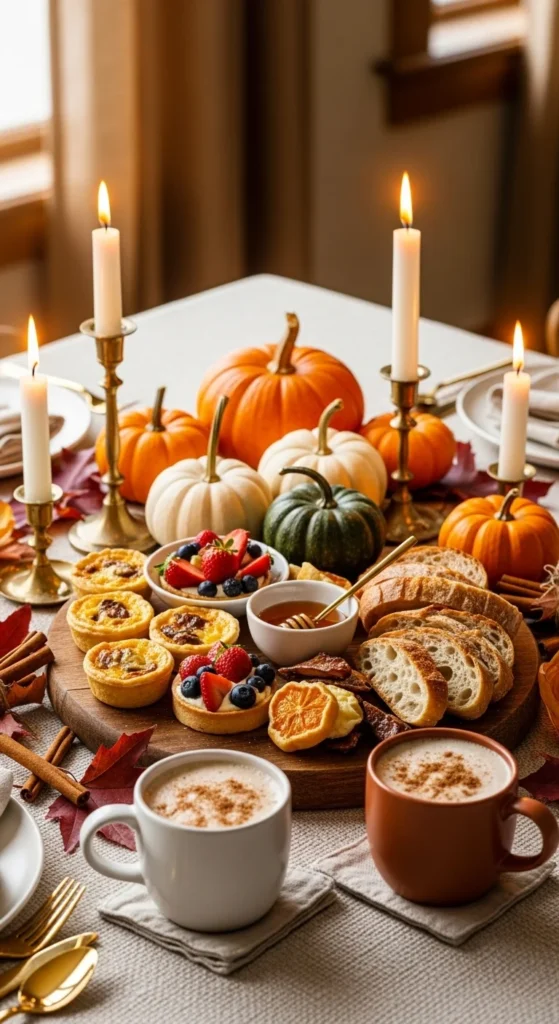
If you love cozy mornings, autumn colors, and the idea of impressing your guests (or your Instagram followers) — then a fall brunch board is your new weekend must-have. Think crisp apples, gooey brie, golden waffles, and warm shades of orange, brown, and gold — all artfully arranged on one beautiful platter.
It’s easy, customizable, and so photogenic that you might hesitate to eat it first. Let’s dive into how to build the ultimate fall brunch board that tastes and looks like autumn magic.
Step 1: Choose a Theme and Color Palette
Before you start piling on the food, think about the vibe you want. A fall brunch board is all about warm tones and cozy textures.
Go for:
- Colors: Burnt orange, deep red, caramel brown, soft cream, and golden yellow.
- Textures: Crisp (like apples), creamy (like cheese or yogurt), and flaky (like pastries).
- Mood: Rustic and inviting — think “autumn picnic meets Sunday morning.”
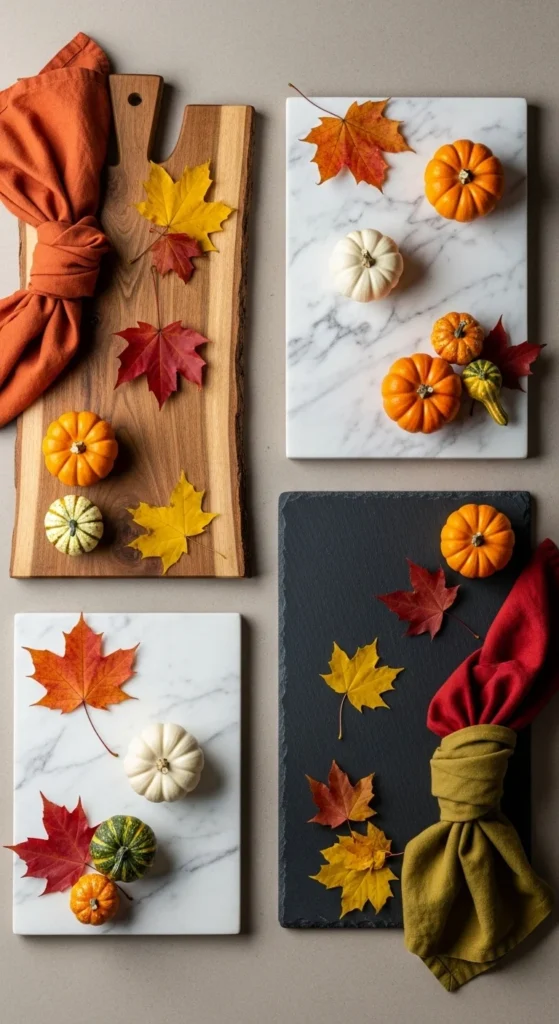
You can even pick a board style to match:
- A wooden board for a natural, rustic look.
- A white marble platter for something more chic and minimal.
Step 2: Pick the Brunch Staples
Now it’s time to fill your board with delicious, camera-ready bites. Mix sweet and savory items for the perfect balance.
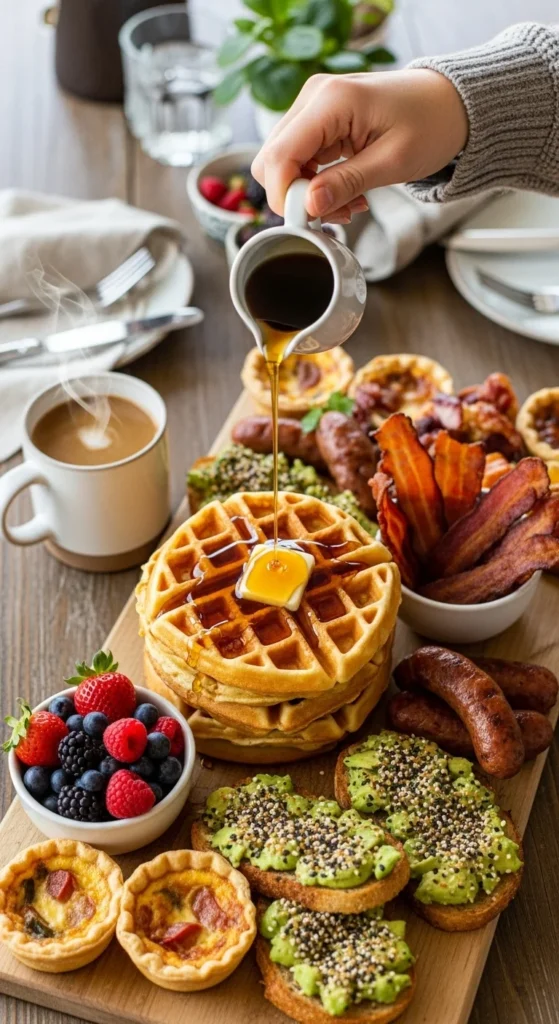
🧇 Sweet Options
- Mini waffles or pancakes
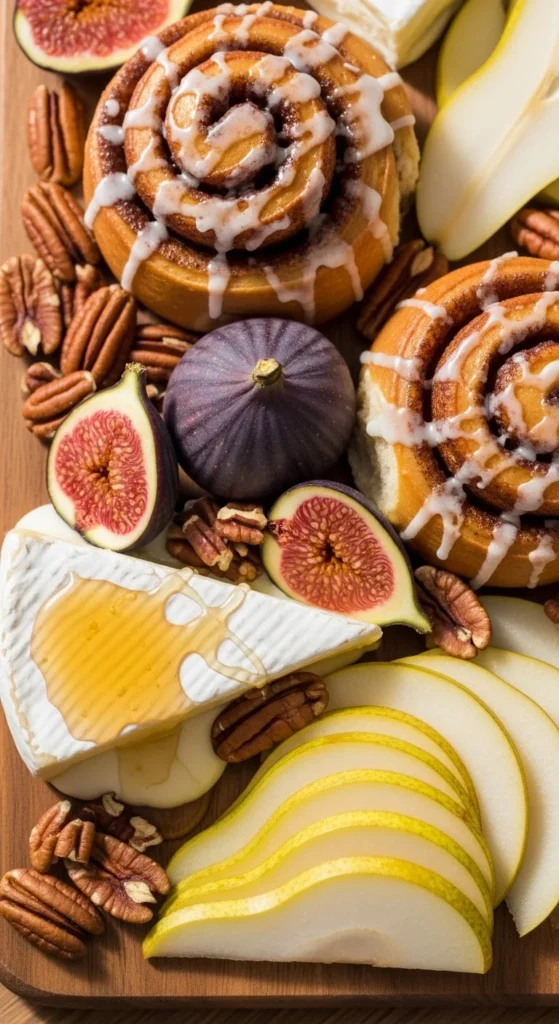
- Cinnamon rolls or pumpkin muffins
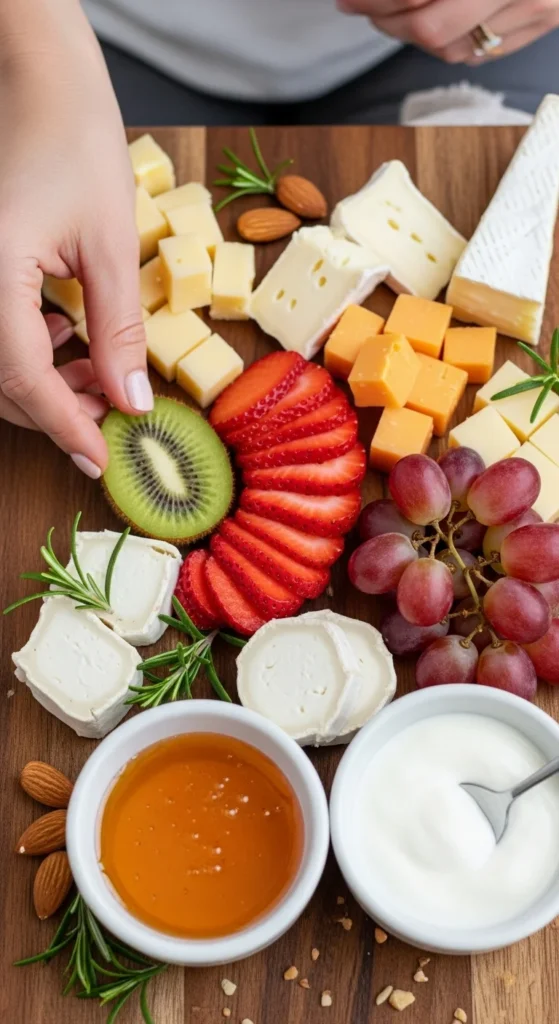
- Sliced fruits: apples, pears, figs, and oranges
- Maple syrup, honey, or fruit preserves
🧀 Savory Additions
- Soft cheeses (brie, goat cheese, or camembert)
- Hard cheeses (aged cheddar or gouda)
- Smoked salmon, turkey slices, or prosciutto
- Mini bagels or croissants
🍂 Extras for Charm
- Nuts (pecans or almonds)
- Dried fruit (cranberries, apricots)
- Decorative touches like rosemary sprigs or edible flowers
Step 3: Layer and Arrange Like a Pro
The magic of a stunning brunch board lies in how you arrange it. You don’t need to be a stylist — just follow these simple tricks:
- Start with the big items.
Place waffles, bowls, and cheeses first to anchor your layout. - Add color variety.
Don’t group similar colors together. Spread out the reds, browns, and creams for visual balance. - Use small bowls.
For syrups, jams, yogurt, or spreads — they create shape and texture variety. - Fill the gaps.
Tuck in nuts, berries, and herbs to fill any empty space. The fuller it looks, the more inviting it feels. - Create layers.
Stack pancakes or pile fruit slightly higher in the middle for that Pinterest-perfect 3D look.
Step 4: Add Cozy Fall Touches
Your brunch board should feel like fall even before anyone takes a bite. Here’s how to cozy it up:
- Add mini pumpkins or pinecones around the board (but not on the food).
- Use linen napkins or a plaid tablecloth underneath.
- Light a cinnamon or vanilla candle nearby.
- Serve with warm drinks like spiced chai, apple cider, or pumpkin lattes.
For an extra Instagram-worthy detail, drizzle a little honey over the cheese or dust cinnamon over the fruit right before snapping photos.
Step 5: Capture the Perfect Photo
You’ve built the dream brunch board — now let’s make it shine online. Here are a few photo tips:
- Natural light only. Set up near a window for soft, even lighting.
- Top-down angle for the classic flat lay shot.
- Add a few “in-action” moments — like pouring syrup or holding a coffee mug.
- Use warm filters or slightly increase contrast to make those fall colors pop.
Step 6: Serve and Savor
Once the photos are done, it’s time to dig in! Invite your friends or family, play some soft jazz or acoustic tunes, and enjoy your creation.
A brunch board is not just food — it’s an experience. It brings people together, sparks conversation, and adds a little seasonal joy to your day.
Final Takeaway
Creating an Instagram-worthy fall brunch board is easier than it looks — it’s all about color, variety, and those cozy finishing touches. So gather your favorite fall treats, grab a wooden board, and start styling your own masterpiece.
🍁 Save this idea for your next weekend brunch — your guests (and followers) will love it!

Leave a Reply