
If you’ve ever scrolled through Pinterest and found yourself drooling over those perfectly layered breakfast parfaits — creamy yogurt, juicy fruit, crunchy granola, all stacked like edible art — you’re not alone. The good news? You don’t need a food stylist or fancy equipment to make them. You just need a few simple ingredients, a little know-how, and a touch of creativity.
In this guide, you’ll learn how to build Pinterest-worthy breakfast parfaits that are as stunning as they are delicious. Whether you’re prepping for a brunch, a healthy grab-and-go breakfast, or just a cozy morning treat, these tips will help you nail that perfect balance of beauty and flavor.
Step 1: Gather Your Star Ingredients
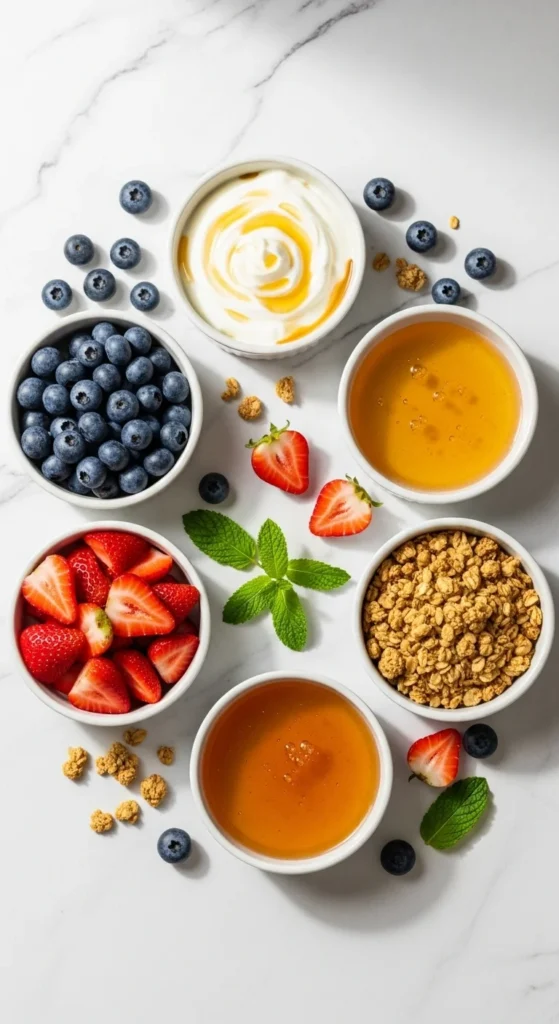
The secret to a gorgeous parfait starts with fresh, vibrant ingredients that pop visually and taste incredible together. Here’s what you’ll need:
- Yogurt: Greek, vanilla, coconut, or plant-based — choose your favorite texture and flavor. Thick yogurt gives you those distinct layers.
- Fruit: Think colorful and seasonal! Berries, mangoes, kiwis, and peaches all layer beautifully.
- Crunch: Granola, crushed nuts, or toasted coconut flakes for texture.
- Sweet Touch: A drizzle of honey, maple syrup, or fruit compote for extra flavor.
- Extras (optional): Chia seeds, cocoa nibs, or edible flowers for flair.
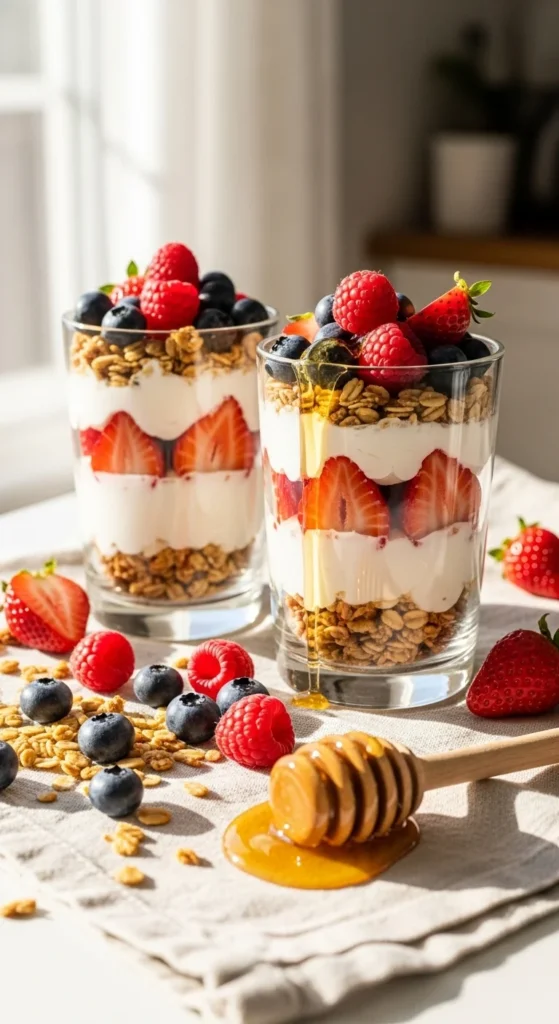
Pro Tip: Pick a clear glass jar or tumbler. Seeing the layers makes the presentation pop!
Step 2: Master the Layering Technique
Layering is where the magic happens — it’s what transforms simple ingredients into something photo-ready.
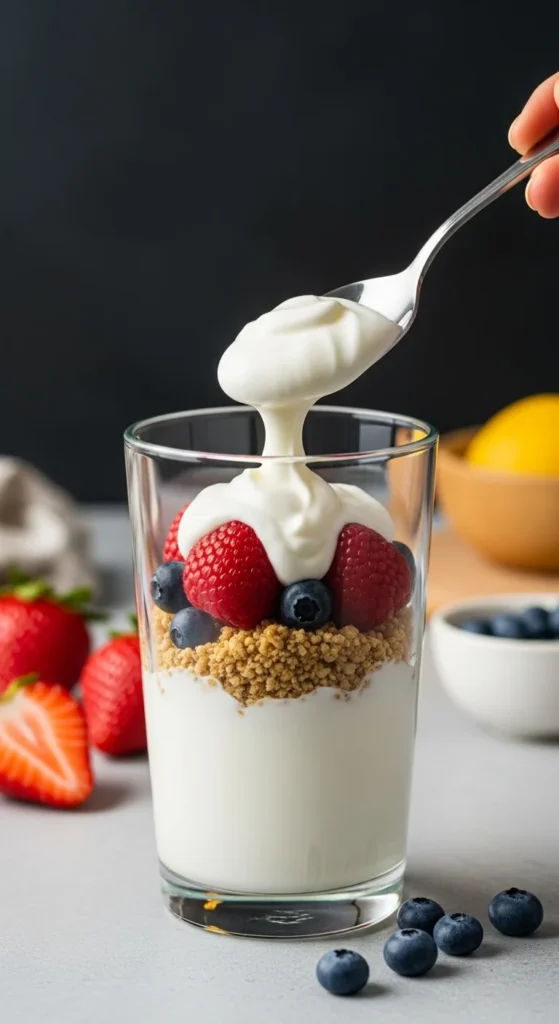
- Start with yogurt.
Spoon a thick layer of yogurt at the bottom of your jar. This creates a clean, solid base that supports the rest. - Add fruit.
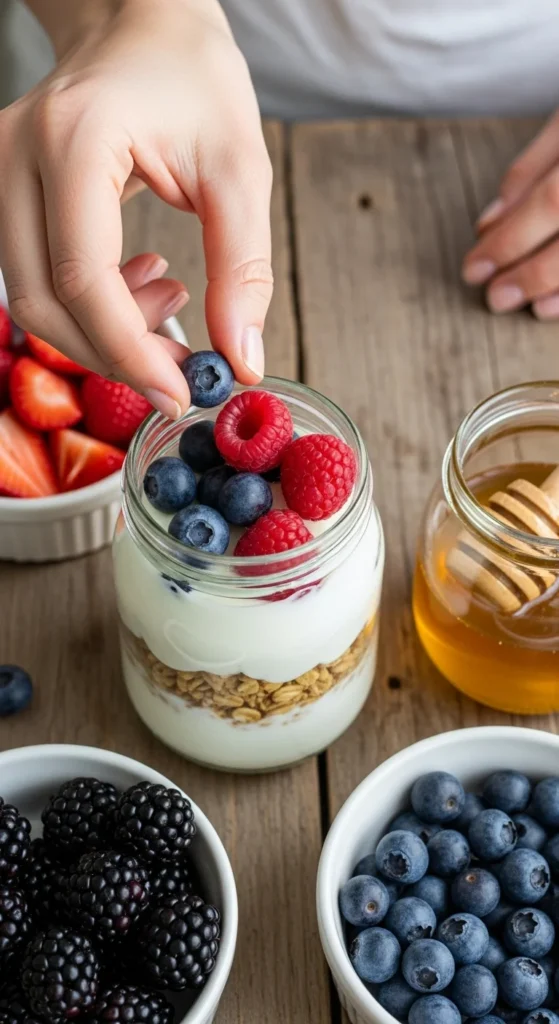
Choose colorful pieces for maximum visual appeal. Strawberries, blueberries, and kiwi create a gorgeous contrast. - Add crunch.
Sprinkle a layer of granola or nuts. This keeps each bite interesting and prevents the parfait from getting soggy. - Repeat.
Alternate layers until you reach the top of your jar. Aim for at least two full sets of layers for that Pinterest aesthetic. - Finish strong.
Top it off with a dollop of yogurt, a few fresh berries, and a drizzle of honey.
Bonus Tip: Use a piping bag or squeeze bottle to neatly add yogurt layers without smudging the sides of the glass.
Step 3: Add a Signature Touch
Want your parfaits to look like they came from a café? Add a signature detail — something that sets them apart.
Try these ideas:
- Drizzle patterns: Use a spoon to swirl honey or berry puree along the inside of the glass before layering.
- Textured toppings: Add toasted coconut flakes, almond slivers, or dark chocolate shavings.
- Garnish with purpose: A mint sprig or edible flower adds that extra “wow” factor.
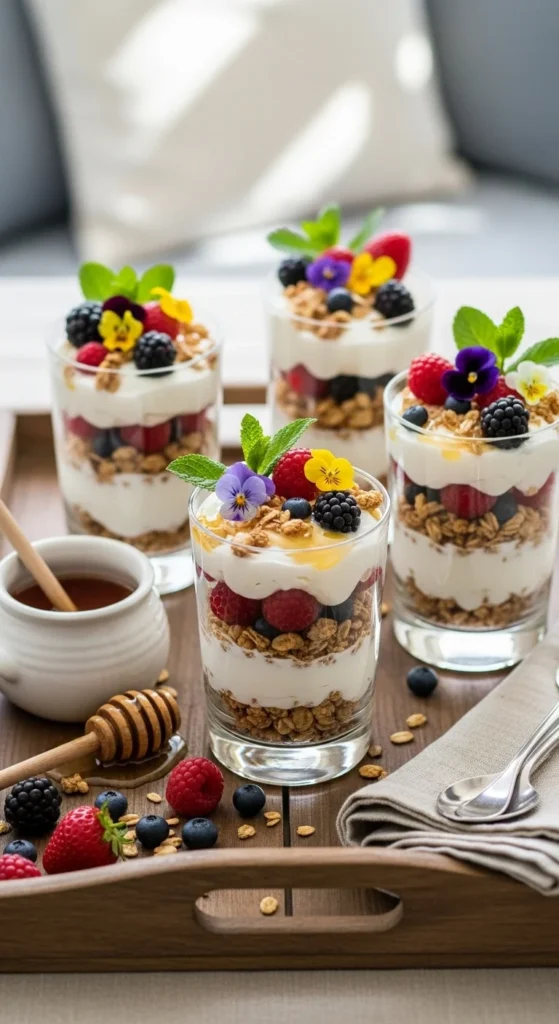
These little touches make your parfaits irresistibly photogenic — and totally shareable.
Step 4: Keep It Fresh (and Gorgeous)
The biggest challenge with parfaits? Preventing sogginess and keeping fruit fresh. Here’s how to keep them as pretty as the moment you made them:
- Store separately: If prepping ahead, keep granola in a separate container and add just before eating.
- Use airtight jars: Mason jars work perfectly and look cute in the fridge.
- Avoid watery fruit: Skip overly juicy fruits (like watermelon) that might leak and blur the layers.
- Chill before serving: A cold parfait holds its shape and tastes extra refreshing.
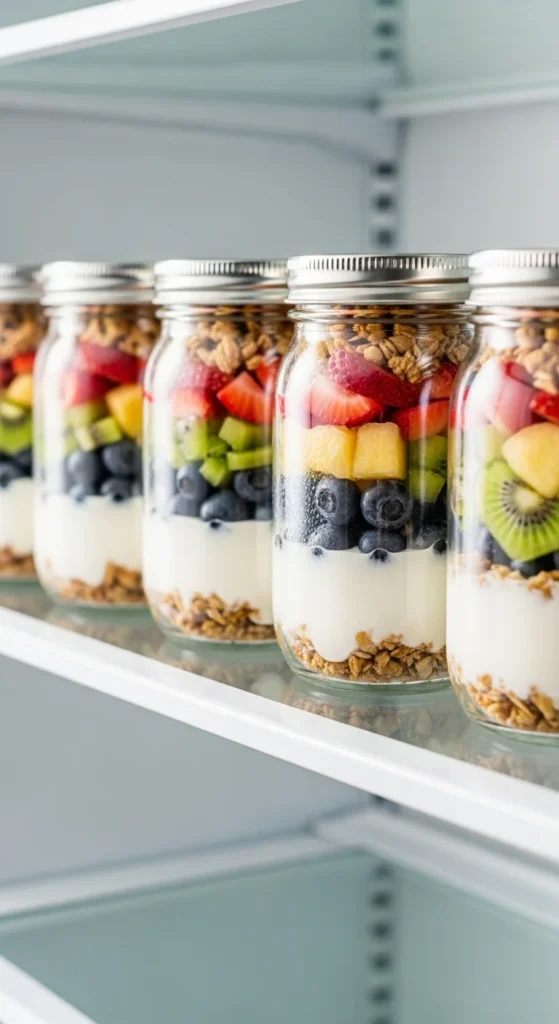
Meal Prep Hack: Make 3–4 jars at once for a quick, healthy breakfast all week long. The layers stay fresh for up to three days!
Step 5: Capture the Pinterest-Perfect Photo
You’ve made a masterpiece — now show it off! A few photography tips will help you make your creation shine online:
- Natural light is your best friend. Take photos near a window for soft, flattering light.
- Play with angles. Shoot from the side to show off the layers, or from above for a colorful top-down shot.
- Minimal clutter. Keep props simple — a linen napkin, spoon, or cutting board is all you need.
.
The Final Scoop
Building beautiful breakfast parfaits is part art, part breakfast prep — and once you get the hang of it, it’s addictive! Each layer tells its own story: creamy, crunchy, fruity, and sweet.
So grab your favorite ingredients, stack them high, and make your mornings look (and taste) like they belong on your Pinterest board.
✨ Save this recipe for later — your future breakfast self will thank you!

Leave a Reply